
Cherry blossoms, or sakura, are more than just seasonal flowers that paint the surroundings with soft pinks and whites. In Japan, their bloom signals the arrival of spring, renewal, impermanence, and the fleeting nature of life. For centuries, sakura have been celebrated in poetry, painted on scrolls, and toasted during hanami (flower-viewing) picnics. Their blossoms don’t last long, but it is exactly their fleetingness that makes us appreciate them more.
If you’ve ever stood beneath a cherry tree in full bloom, or even just saw them on a photo and thought, “Can I grow cherry blossoms from scratch?”, the answer is: yes, but it takes work. Growing a sakura tree from seed isn’t your typical weekend garden project. These seeds are slow and stubborn, and to unlock their potential, we must first understand and replicate their natural lifecycle.
That’s where scarification and stratification come in. They sound technical, but they’re really just ways to mimic what happens in the wild: cracking open a tough seed coat and tricking the seed into thinking it’s lived through winter.
This guide walks you through the process, step by step: from choosing the right kind of seed to creating the perfect conditions for germination. If you’re ready to grow your own cherry blossom tree and bring a piece of spring into your everyday life, you’re in the right place.
Step 1: Scarification and Stratification
Step 2: Scarification Techniques
Step 3: Stratification Process
Growth Timeline: What to Expect and When
Step 1: Picking the Right Seed

Image Credit: Amazon
First things first, picking quality sakura seeds is important. Not all cherry blossom trees are created equally, and not all of them will give you the classic sakura bloom you’re probably picturing. If you want that soft pink, cloud-like effect seen in Japanese spring festivals, you’ll need to start with the right species.
Go for Prunus serrulata, the Japanese flowering cherry and the star of the hanami season. It’s ornamental, not fruiting, and it’s bred for beauty: pale pink or white blossoms, elegant branching, and a strong visual impact. Look specifically for cultivars like “Somei Yoshino” or “Kanzan”, both beloved for their full, showy blooms.
Skip the generic seed packets at the hardware store. Instead, look for specialty seed suppliers or nurseries that: (1) label their seeds clearly with species names like Prunus serrulata, (2) offer fresh, viable seeds, as sakura seeds lose viability fast, and (3) provide growing instructions or support. Online Japanese gardening shops, bonsai specialty stores, and some botanical gardens’ gift shops are often good bets.
Pro tip: If you don’t want cherry blossoms that actually fruit cherries, it’s better to avoid species such as Prunus avium and Prunus cerasus as these fruit-bearing trees may be better for pies rather than pretty petals.
Step 2: Scarification

Image Credit: Shaw Green Trees
Nature built sakura seeds to survive harsh winters and only germinate when conditions are just right. The first hurdle? A hard, protective seed coat that blocks out moisture and air. Sakura seeds have a hard outer coating that protects them through harsh winters, but indoors, that coat becomes a barrier.
Scarification is the process of weakening that tough shell so the seed can absorb moisture and start growing. By weakening the outer shell, you help the seed absorb water, which is essential for germination.
Here are some methods you can use to do this:
Hydrogen Peroxide Soak:
Soaking seeds in a 10% hydrogen peroxide solution for 10 minutes can help soften the shell and reduce the risk of mold during stratification. It’s a gentle first step. Remember, this method is mild and is best combined with others.
Sandpaper Method
By rubbing the seeds against sandpaper, you wear down the hard exterior, making it easier for moisture to penetrate. This is effective and relatively low-risk.
Metal File Method
Unlike the sandpaper technique, metal filing can be more aggressive, but it gives you better control and can efficiently wear down the shell. File one side of the seed until you see a slight change in texture or color.
Nicking with a Knife or Sharp Instruments
A tiny cut in the shell can work wonders—but precision is everything. You want to nick the surface, not stab the seed embryo inside. One wrong move, and you might harm the seed within.
Cracking with Pliers
Lastly, using pliers to crack the shell open can be very effective. Though the most aggressive, it guarantees direct access to the inner seed. However, caution is crucial. Carefully squeeze the shell until it cracks, being extremely careful not to crush the seed entirely.

Step 3: Stratification
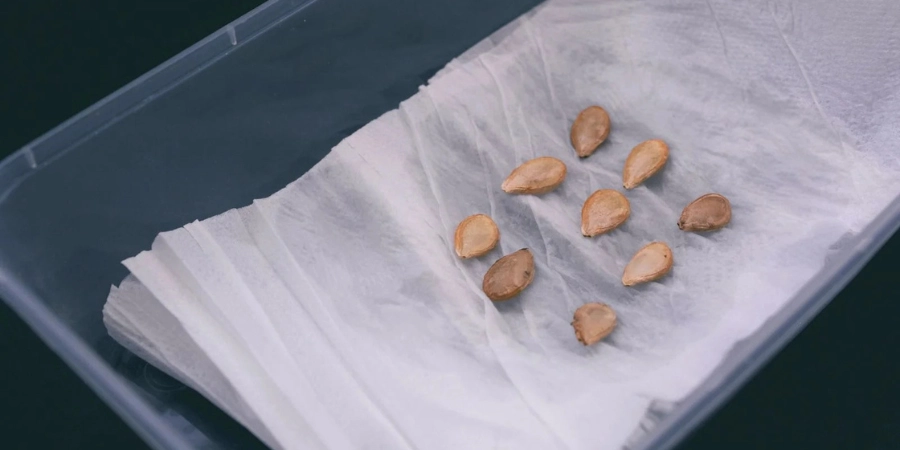
Image Credit: Epic Gardening
Now that your seed is ready to grow, you need to trick it into thinking it has lived through winter, as sakura seeds are biologically wired to sprout in spring, after months of cold dormancy.
This process is called stratification, and you can actually recreate it in your fridge.
To do this, you’ll need:
- Resealable plastic bag
- Moist paper towel or sterile vermiculite
- Labels and markers (trust us, you’ll forget what’s what)
- Refrigerator (not freezer!)
- Tweezers, gloves
- Most importantly, patience
Here’s how to stratify your seeds:
- Rinse and Soak: Gently rinse your seeds and soak them in hydrogen peroxide for about 10 minutes to reduce mold risk.
- Prepare for Cold: Place the seeds between moist paper towels inside a zip-lock bag. Label the bag with the date and variety.
- Refrigerate: Store the bag in your refrigerator (not the freezer) for 2–8 weeks. Check periodically for signs of sprouting.
- Patience Pays Off: Some varieties may take longer, so don’t be discouraged if you don’t see immediate results. Look for a tiny white root emerging from the seed; that’s your cue that it’s ready to be planted.
Step 4: Germination

Image Credit: Lifehacker
Once your seeds have stratified and you see tiny roots emerging, it’s time to plant!
To do this, you’ll need:
- Seed-starting tray or small pots
- Well-draining potting mix (preferably light and slightly acidic)
- 10% hydrogen peroxide solution
- Spray bottle or watering can
- Plastic dome or cling film (for humidity control)
- Sunlight or grow light
Here’s how to stratify your seeds:
- Rinse the seeds and soak them in the hydrogen peroxide solution.
- Scarify, if not done already.
- Sow the seeds on the potting mix, covering them lightly with soil. If you’re transferring stratified seedlings, simply place them in the soil.
- Expose the seeds or seedlings to sunlight.
- Maintain medium humidity with regular watering. Germination varies, taking anywhere from a few weeks to several months.
- Optionally, use a copper-based fungicide to deter mold.
Step 5: Outdoor Transplanting

Image Credit: Planet Natural
Eventually, when your seedlings are strong enough and the weather is right, you may begin preparing them for the outdoors. In this step, timing and location are everything.
Either spring or early autumn is ideal for transplanting the sakura plant. It is vital to remember to avoid the heat of summer or frost-prone seasons. Just take note that your sakura needs at least 6 hours of full sun each day. As for the soil, well-draining, loamy soil with a slightly acidic pH (6.0–6.5) is key in maintaining the right balance of moisture and nutrients, helping prevent root rot while encouraging healthy root development and optimal nutrient absorption. Moreover, young trees are fragile. Hence, you must avoid placing them in exposed spots with strong winds or extreme weather.
Growth Timeline: What to Expect and When
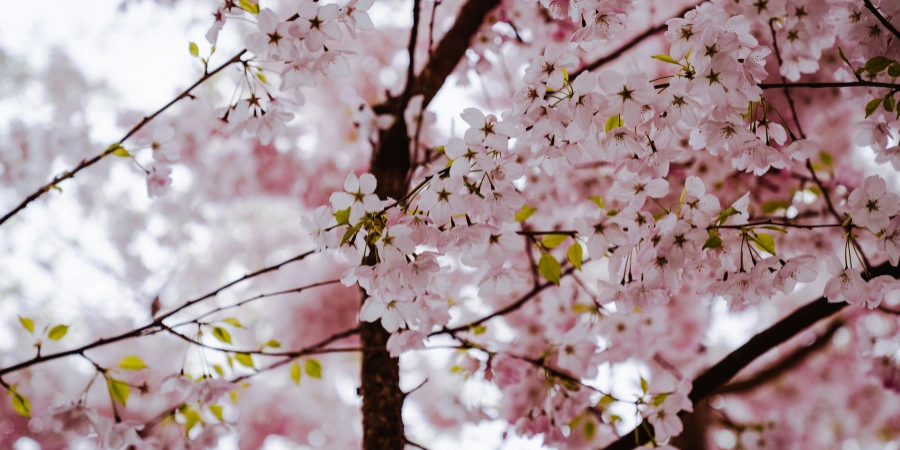
Image Credit: Unsplash
Growing a sakura tree from seed is a slow, rewarding process—one that teaches patience as much as it does gardening.
In the first year, most of the action is happening underground. The seed focuses on establishing a healthy root system, so visible growth above the soil will be minimal. You might see a few small leaves, but don’t expect a full-fledged sapling just yet.
By the second year, the tree begins to take shape. The trunk thickens slightly, branches begin to form, and the structure of a small tree starts to emerge. It’s also around this time that your sakura may need repotting or thinning if it was started in a tray.
Heading into the third and fourth years, you’ll notice a fuller canopy and stronger stems. If your tree has had ideal growing conditions—plenty of sun, consistent care, and healthy soil—you may even see its very first blossoms during this stage. This is rare but possible, especially with more vigorous varieties.
Most sakura trees, however, begin regular blooming between years five and seven. By this time, the tree has matured enough to produce those signature pink or white blossoms. Each spring, you’ll be rewarded with a floral display that’s not only beautiful but symbolic—a reminder of the effort, care, and time that brought it to life.
Staying on track means keeping an eye on overall plant health. Bright green leaves, consistent yearly growth, and the absence of mold, pests, or wilting are good signs that your sakura is thriving.
Frequently Asked Questions
- How long does it take for sakura seeds to germinate?
- Germination can take anywhere from 2 weeks to several months, depending on the seed variety, the method used (stratified or direct), and environmental conditions such as temperature, moisture, and light. Stratified seeds tend to sprout more reliably and faster than untreated ones.
- Is hydrogen peroxide essential for the process?
- It’s not mandatory, but it’s strongly recommended. A short soak in a 10% hydrogen peroxide solution helps sterilize the seeds, softens the outer shell slightly, and reduces the risk of mold, especially during the stratification phase in the fridge.
- Can I skip stratification?
- You can, but skipping stratification greatly reduces germination rates, since sakura seeds are biologically programmed to sprout only after a cold dormancy period. If you want consistent results, simulate winter with 2–8 weeks in the fridge.
- How often should I water the seeds?
- Keep the soil consistently moist but not soggy. Think “damp sponge”, not “wet towel”. Overwatering can lead to rot, while underwatering may dry out the delicate roots. If you’re germinating indoors, check moisture daily and mist if needed to maintain medium humidity.
- Is sunlight crucial for germination?
- Yes, sakura seeds and seedlings need light to grow strong. Aim for at least 6 hours of direct sunlight per day, or supplement with a grow light. Without enough light, your seedlings may become weak and slow to develop.
- What’s the best fertilizer for sakura trees?
- Use a balanced, slow-release fertilizer in early spring just before new growth begins. To increase the number of your flowers and make them more durable, you can switch to a fertilizer with slightly more phosphorus during bloom season. Avoid over-fertilizing (once every few months is enough for young trees).
- What are some common mistakes, and how do I avoid them?
- Using poor-quality or mislabeled seeds: Always buy from reputable sources that specify the sakura variety
- Skipping scarification or stratification: These steps aren’t optional if you want real results
- Neglecting mold control: Check your stratified seeds weekly and discard any with signs of mold or rot
- Overwatering: Always use well-draining soil, and don’t let containers sit in water
- Low light conditions: Not enough sun = weak seedlings. Prioritize light from day one
- Impatience: Germination can take weeks or months. Stay consistent, and don’t give up too soon
Let’s be real—this isn’t the easiest plant to grow, but that’s part of what makes it so satisfying. From cracking the seed shell to finally seeing those soft petals, the sakura growing journey is full of tiny wins and long pauses. It requires you to slow down, pay attention, and trust in the unseen happening beneath the surface. And one day, when those blossoms finally open, you’ll be reminded why the wait was worth it.
Join Our Newsletter
Sign up for the latest news & offers